Smartphones are now an integral element of modern lives however, even the latest technology aren’t immune to damage. The most commonly encountered issues that users face with their Samsung smartphone is a malfunctioning or damaged screen. Don’t panic; this guide provides everything you need to know about Samsung screen repair from identification of issues through troubleshooting and repair – with proper steps taken and expert tips from Phone Care you’ll soon master it yourself! Before beginning your repair journey, it’s essential to gain an understanding of all of the potential screen issues you could be encountering with your Samsung phone. Common problems include:
Cracked Screen: Physical damage due to drops or impacts. Unresponsive Touchscreen: When touch inputs don’t respond. mes Display Issues: Such as flickering, black spots, or lines across the screen. Every type of issue requires its own approach for repair; therefore, understanding the specific problem is the first step toward taking corrective action.
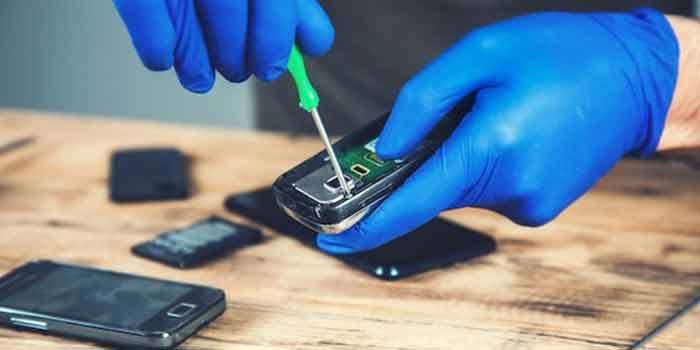
In order to repair a Samsung screen, you’ll require several essential tools. Here is what’s needed:
Precision screwdriver set: Used to unscrew tiny screws on your phone.
Plastic prying tools and spudgers: Helpful when opening phones without damaging internal components. Tweezers for handling small parts. Replacement Screen – When purchasing replacement screens for Samsung models, make sure it matches.
Heat gun or hairdryer: For softening adhesive holding the screen in place.
Adhesive strips or glue: To secure the new screen. Safety Precautions Always switch off and unplug any power sources prior to undertaking repairs on any device, such as phones.
Work in a Clean Environment: Working in an uncluttered workspace will reduce the chance of losing small parts or worsening damages to your phone further.
Proper Lighting: Good lighting allows you to see exactly what you are doing and reduces errors.
To start this step, gently heat the edges of your Samsung phone using either a heat gun or hairdryer, to soften its adhesive surface and make opening it easier. Take care not to overheat as this could potentially damage internal components.
Once the adhesive has softened, use a plastic prying tool to carefully lift off the back cover. Begin at one corner and work your way gradually around until complete removal. Attempt not to use metal tools as they could scratch or damage your phone.
After taking care in opening up the back cover, locate and disengage the battery connector with a plastic spudger to ensure your safety and prevent short circuits during repair. This step must not be skipped!
Whilst using your precision screwdriver set to dismantle the broken screen, carefully lift and pry off using a prying tool and use tweezers if there are adhesive strips present – taking extra care not to damage any internal components!
To secure your new screen in place, place it and secure it with screws. If your new screen comes equipped with adhesive strips, apply them as directed, otherwise use an appropriate glue solution – but make sure that everything is aligned before locking into place!
To reassemble, reconnect the battery, place back cover back on, tighten all screws securely, if necessary use heat gun again to reseal adhesive on back cover if necessary and reconnect heat gun as necessary to reseal adhesive on back cover if required resealing adhesive seal on back cover is necessary
Turn on your Samsung phone and check its new display. Observe for responsiveness, quality of display and any dead spots or other potential issues before declaring the repair complete. If everything functions as intended, congratulations – your work has been successfully done.
Even if you follow all the steps carefully, there may still be problems you encounter along the way. Here are a few common issues and ways to solve them:
Verify all connectors are properly attached as loose connections could cause the touchscreen to malfunction.
Reboot Device: Sometimes rebooting can resolve minor software glitches affecting the touchscreen.
Resetting to Factory Settings: As a last resort, perform a factory reset in order to rule out software issues and backup any data first. Display Issues
Check Your Screen Installation: Make sure it has been properly mounted with no loose screws or connectors present.
Examine for Damages: Look out for signs of physical damage to the new screen; even small cracks can create display problems.
Updating Software: Sometimes display issues can be fixed by updating to the latest software version available on your phone.
While DIY repairs may be cost-effective, professional help may be the better solution in certain instances. If any of the following apply to you, contact them immediately and bring in your phone for repair:
Complex Internal Damage: For problems that extend beyond just the screen, such as motherboard or internal component issues. Persistent Issues: If after following all troubleshooting steps and still experiencing difficulties, seeking professional assistance might be more efficient in diagnosing and solving them than trying to manage yourself.
Tools or Experience: If you don’t possess the necessary tools or are uncertain in your repair abilities, it may be safer to seek expert assistance. Preventive Measures to Avert Future Damage: After having repaired your Samsung screen, taking steps can help prevent future damages:
Use a Screen Protector: A high-quality tempered glass protector can absorb impacts and prevent scratches. Utilize a Rugged Case: For further protection from drops and impacts. Finally, be mindful in how you place and handle your phone – avoid precarious positions in which it could fall.
Mastering Samsung screen repair requires patience, precision and the appropriate tools. By following the steps outlined in this guide and employing its tips and tricks, you should be able to successfully mobile phone repairs Auckland. However, should the task prove too challenging, Phone Care‘s professional expertise and quality service ensure your device will always remain in safe hands. Whether attempting it yourself or seeking professional assistance – whether repairing yourself or professional assistance – ensures your Samsung is maintained in optimal condition for its lifetime extension.